If you have never cooked with farm fresh garlic, you need to plant some – and you need to plant it soon! I let the ground tell me if it is too late to plant garlic for the season. If you can still work the soil and the forecast calls for a few sunny days in the mid 40s you are probably still okay. If the ground is frozen where you live, there is still hope! Simply plant your garlic seed when the ground starts to thaw in the early spring.
Fun Fact: For bigger, juicer, more flavorful garlic bulbs plant your garlic in the fall, allow it to overwinter, and harvest it the following summer.
My planting guide is for 2ft wide beds raised beds. Using the spacing provided, you can adjust the pattern to accommodate your space.
Step 1: Picking out your garlic variety
It is no surprise that there are dozens of garlic varieties to chose from. Check out these three websites to learn more about the common varieties you may find at your local nursery. I went with the classic hard neck , which tend to be reliable growers and have more usable garlic cloves per bulb. I also bought a few elephant garlic just for fun. They are notorious for having ridiculously large pungent cloves.
Step 2: Split apart the bulb
Depending on the variety, each garlic bulb will give you a range of individual cloves. When you pull apart the clove, make sure you keep the papery outer skin intact. I prefer to use the nice fat outer cloves and save the smaller ones for cooking. Yes I cooked with my seed garlic! Once I knew how many cloves I had to plant, I was able to plan out my garden space. I had so many garlic cloves, I wound up planting them throughout my flower beds!

Plant nice fat garlic cloves like the one on the left and use smaller ones for cooking like the one on the right.
Step 3: Check the weather or soak your cloves
I planted my garlic right before a few fairly wet days. Garlic cloves form the root system for your garlic plant, so you want them to stay nice and moist. You can do this by soaking them, watering them often, or planting them right before a good rain storm. This planting guide recommends soaking them in a quart jar for 2 hrs with a tablespoon of baking soda and a tablespoon of liquid seaweed.
Step 4: Plant
Due to my bed size, and my desire to squeeze in as many as I could, I planted my garlic following the pattern below.
Using this pattern, place the garlic flat side down and pointy side up into 3 inch deep holes. Cover the garlic with soil and water well even if the weather predicts rain. You do not want to take the chance!
Step 5: Mulch
Once you are finished planting, mulch your beds using either straw or chopped leaves. Chopped leaves can hide garden pests such as slugs. I would avoid using this any other time of the year, but since it is winter and if you promise to remove it first thing in the spring – why not use what you have on hand.

Add at least 6 inches of straw to your beds to protect the roots. Constant freezing and thawing can tear apart the root system.
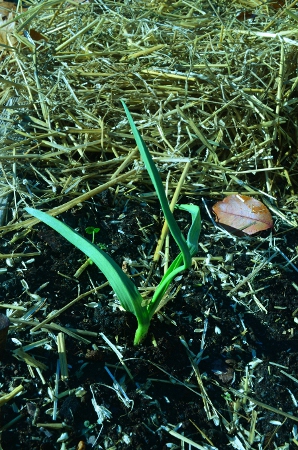
You should begin to see the sprouts in about 4-6 weeks. Check back in the spring and I will teach you how to clip the garlic scapes, share with you a yummy recipe for garlic scape pesto, and teach you how to harvest your home grown garlic cloves!


